
What are the differences between “strong” and “ball” buttons?

In our previous blog post, we explained to you how to put snap button on a leather, praising each of its qualities.
Nevertheless, it is important to remember that a second category of press buttons exists: that of “strong press studs”.
A strong press button, is a very solid closing system that will clip your fastener. Whether it is leather, fabric or any other type of textile, it is essential to finalize your work.
Why use a strong button?
The classic ball press button is known for its ease of application, where the strong press button is designed for its strength.
In fact, they were designed to support higher breaking loads, they are also known as case-type buttons.
Available in several diameters, the buttons available on our site allow you to choose a load suitable for your leather strap or your bag handle for example.
How is it constituted?
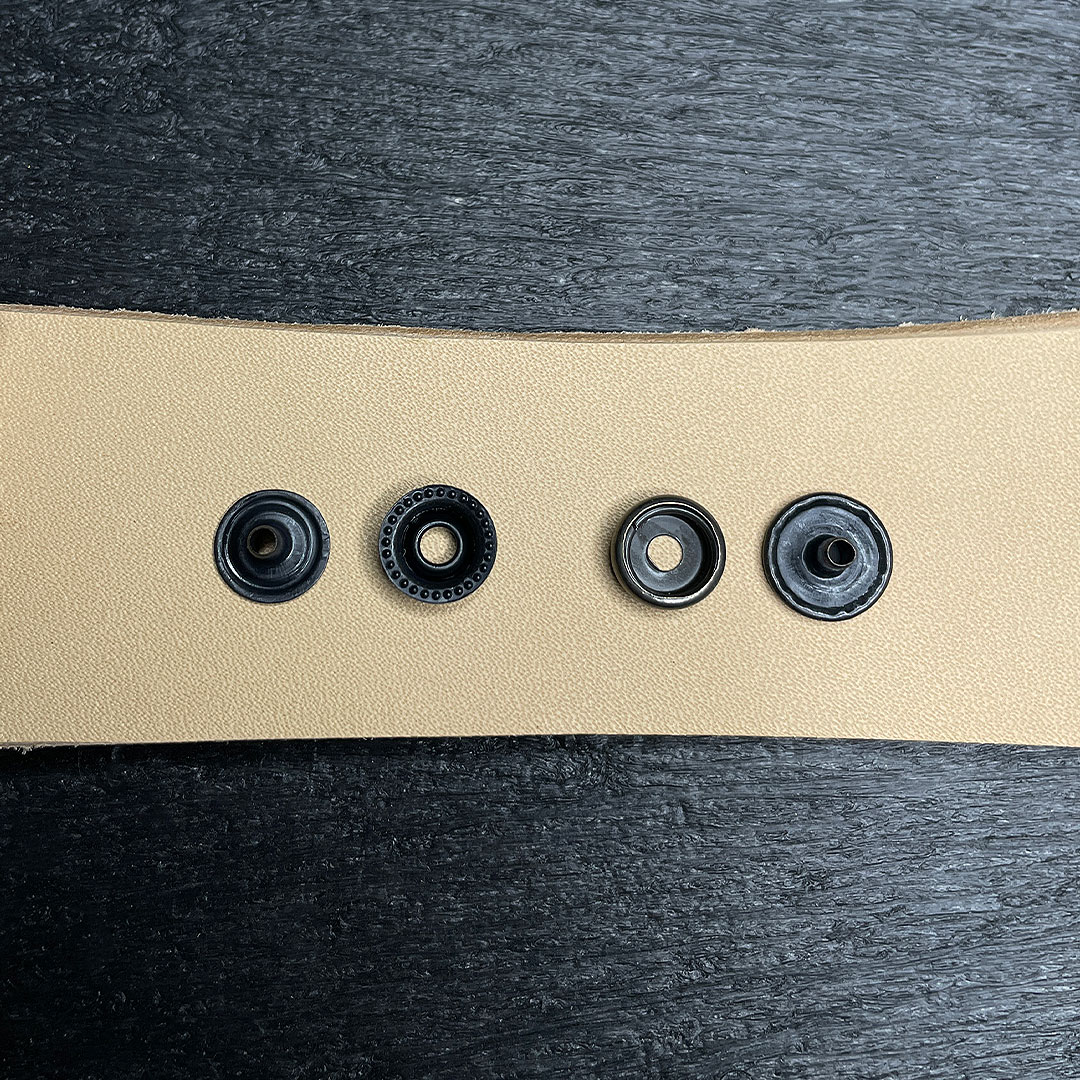
A strong press button is made up of four parts: two cylindrical male parts fit into two female cavities allowing the housing system to be completed.
The pro tip:
- It's important to take into account the thickness of your leather. A case too big on small leather goods is not recommended, it will accelerate the wear of your creation and damage the skin.
- In parallel, a button too small on a piece of leather too thick guarantees a friable realization, which will open constantly.
How to set a strong button manually?
To install a press stud, several solutions are available to you: mechanically with a conventional press or manually using a suitable post system.
Below: steps to follow for manual installation:
Step 1:
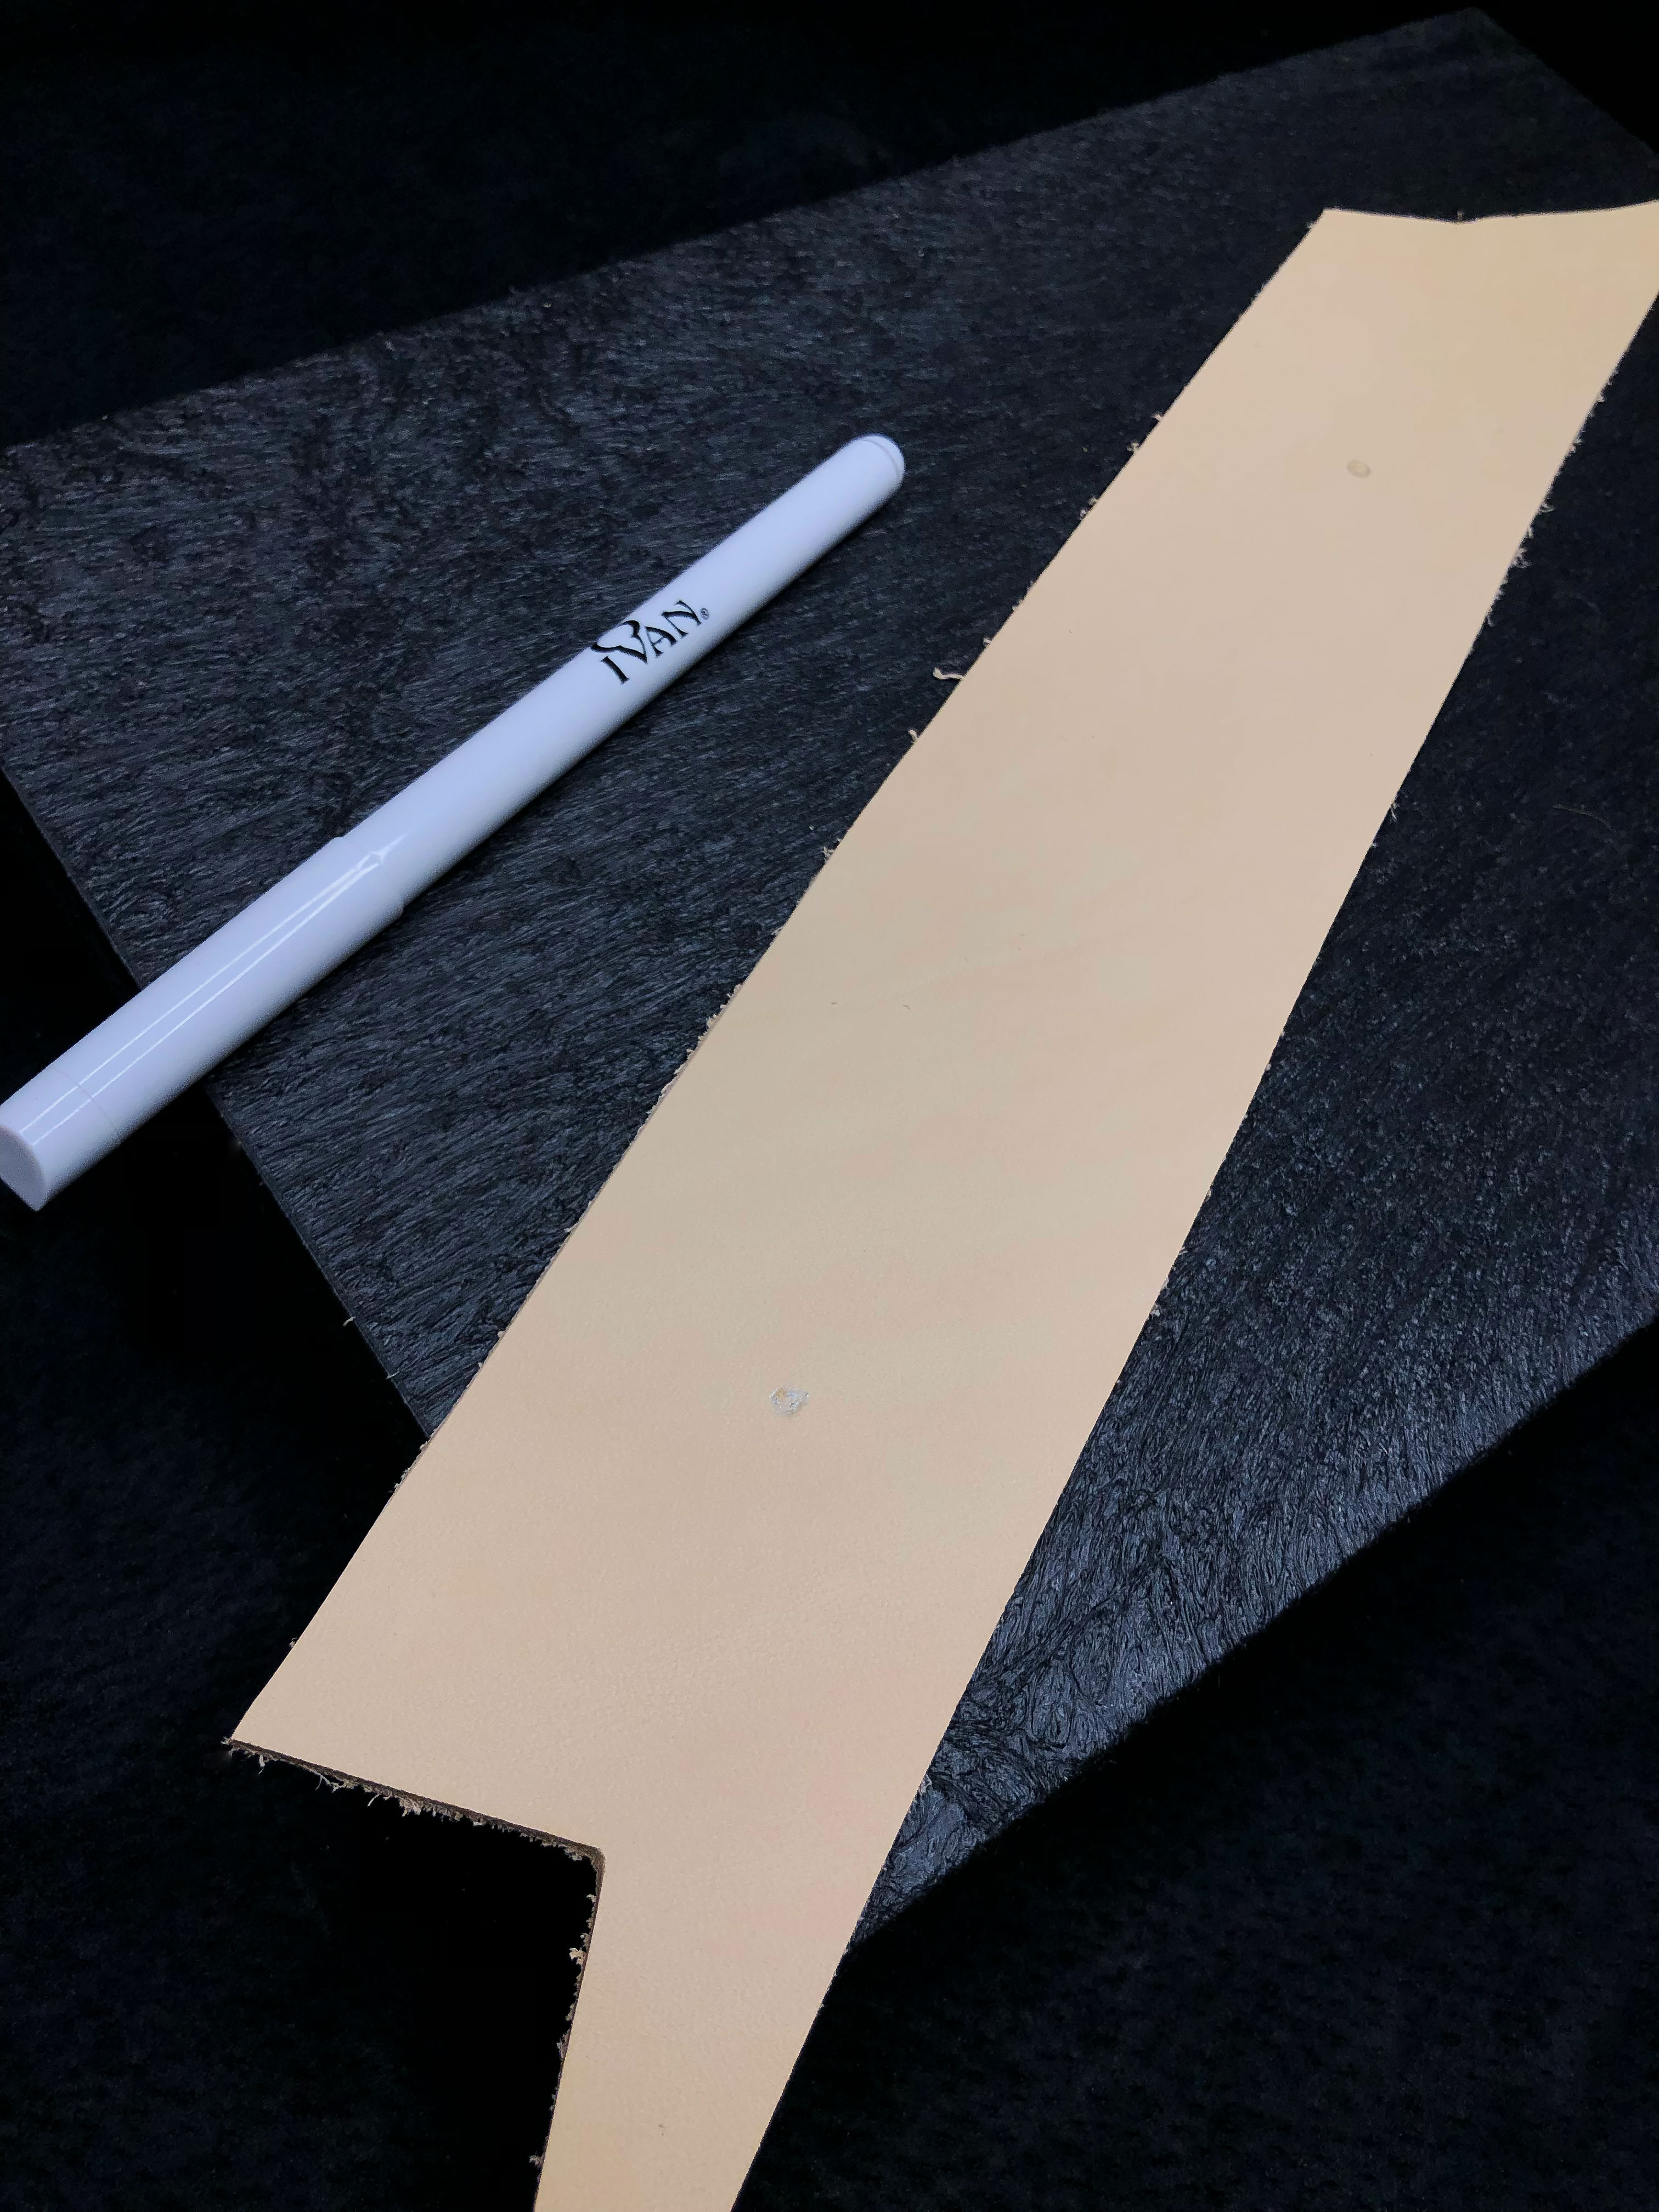
Before you start, get a leather marking pen to mark your skin. This professional reflex is the assurance of flawless precision when you want to cut or pierce a leather strap for example.
Step 2:
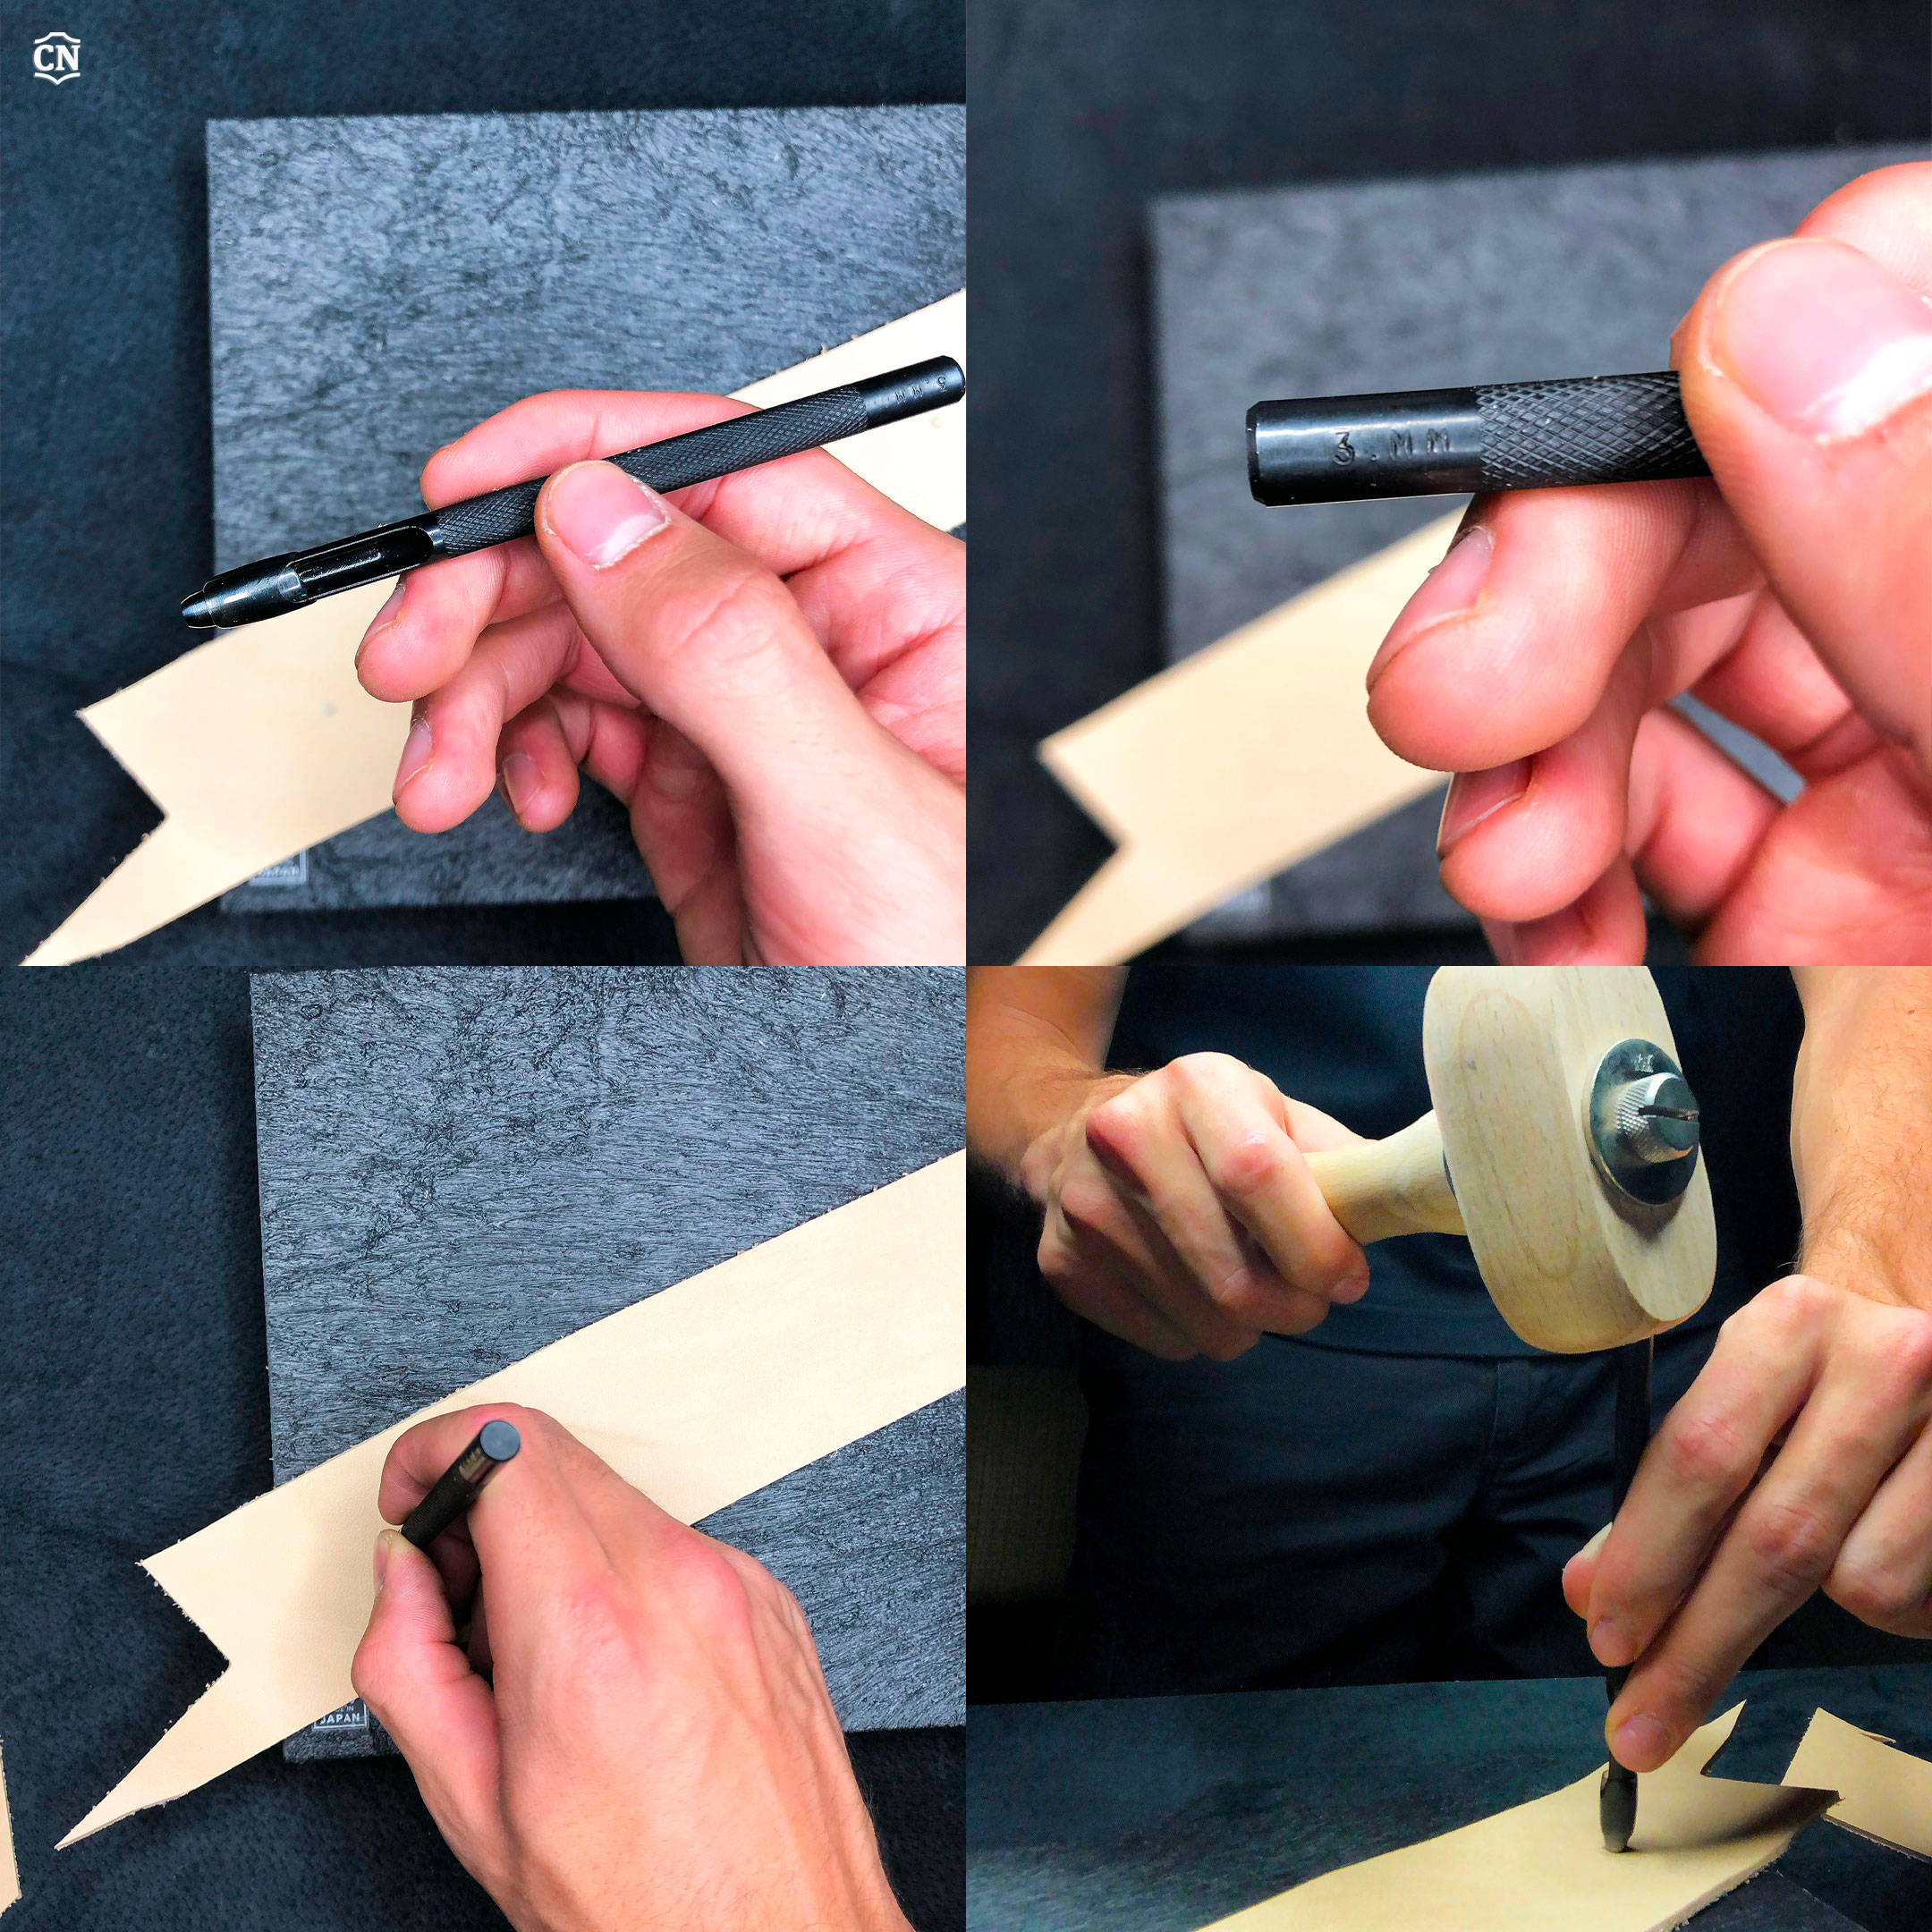
Once your marks are visible, pierce your leather using a round hole drive punches. Of course, the cutting diameter must match the size of your button*.
*Here the diameter of the cutting tool is 3 mm for a 12.5 mm button.
The pro tip:
In order to get a clean cut, hit your tool with a wooden hammer maul. A few quick strokes will be enough to pierce your piece of leather.
Step 3:
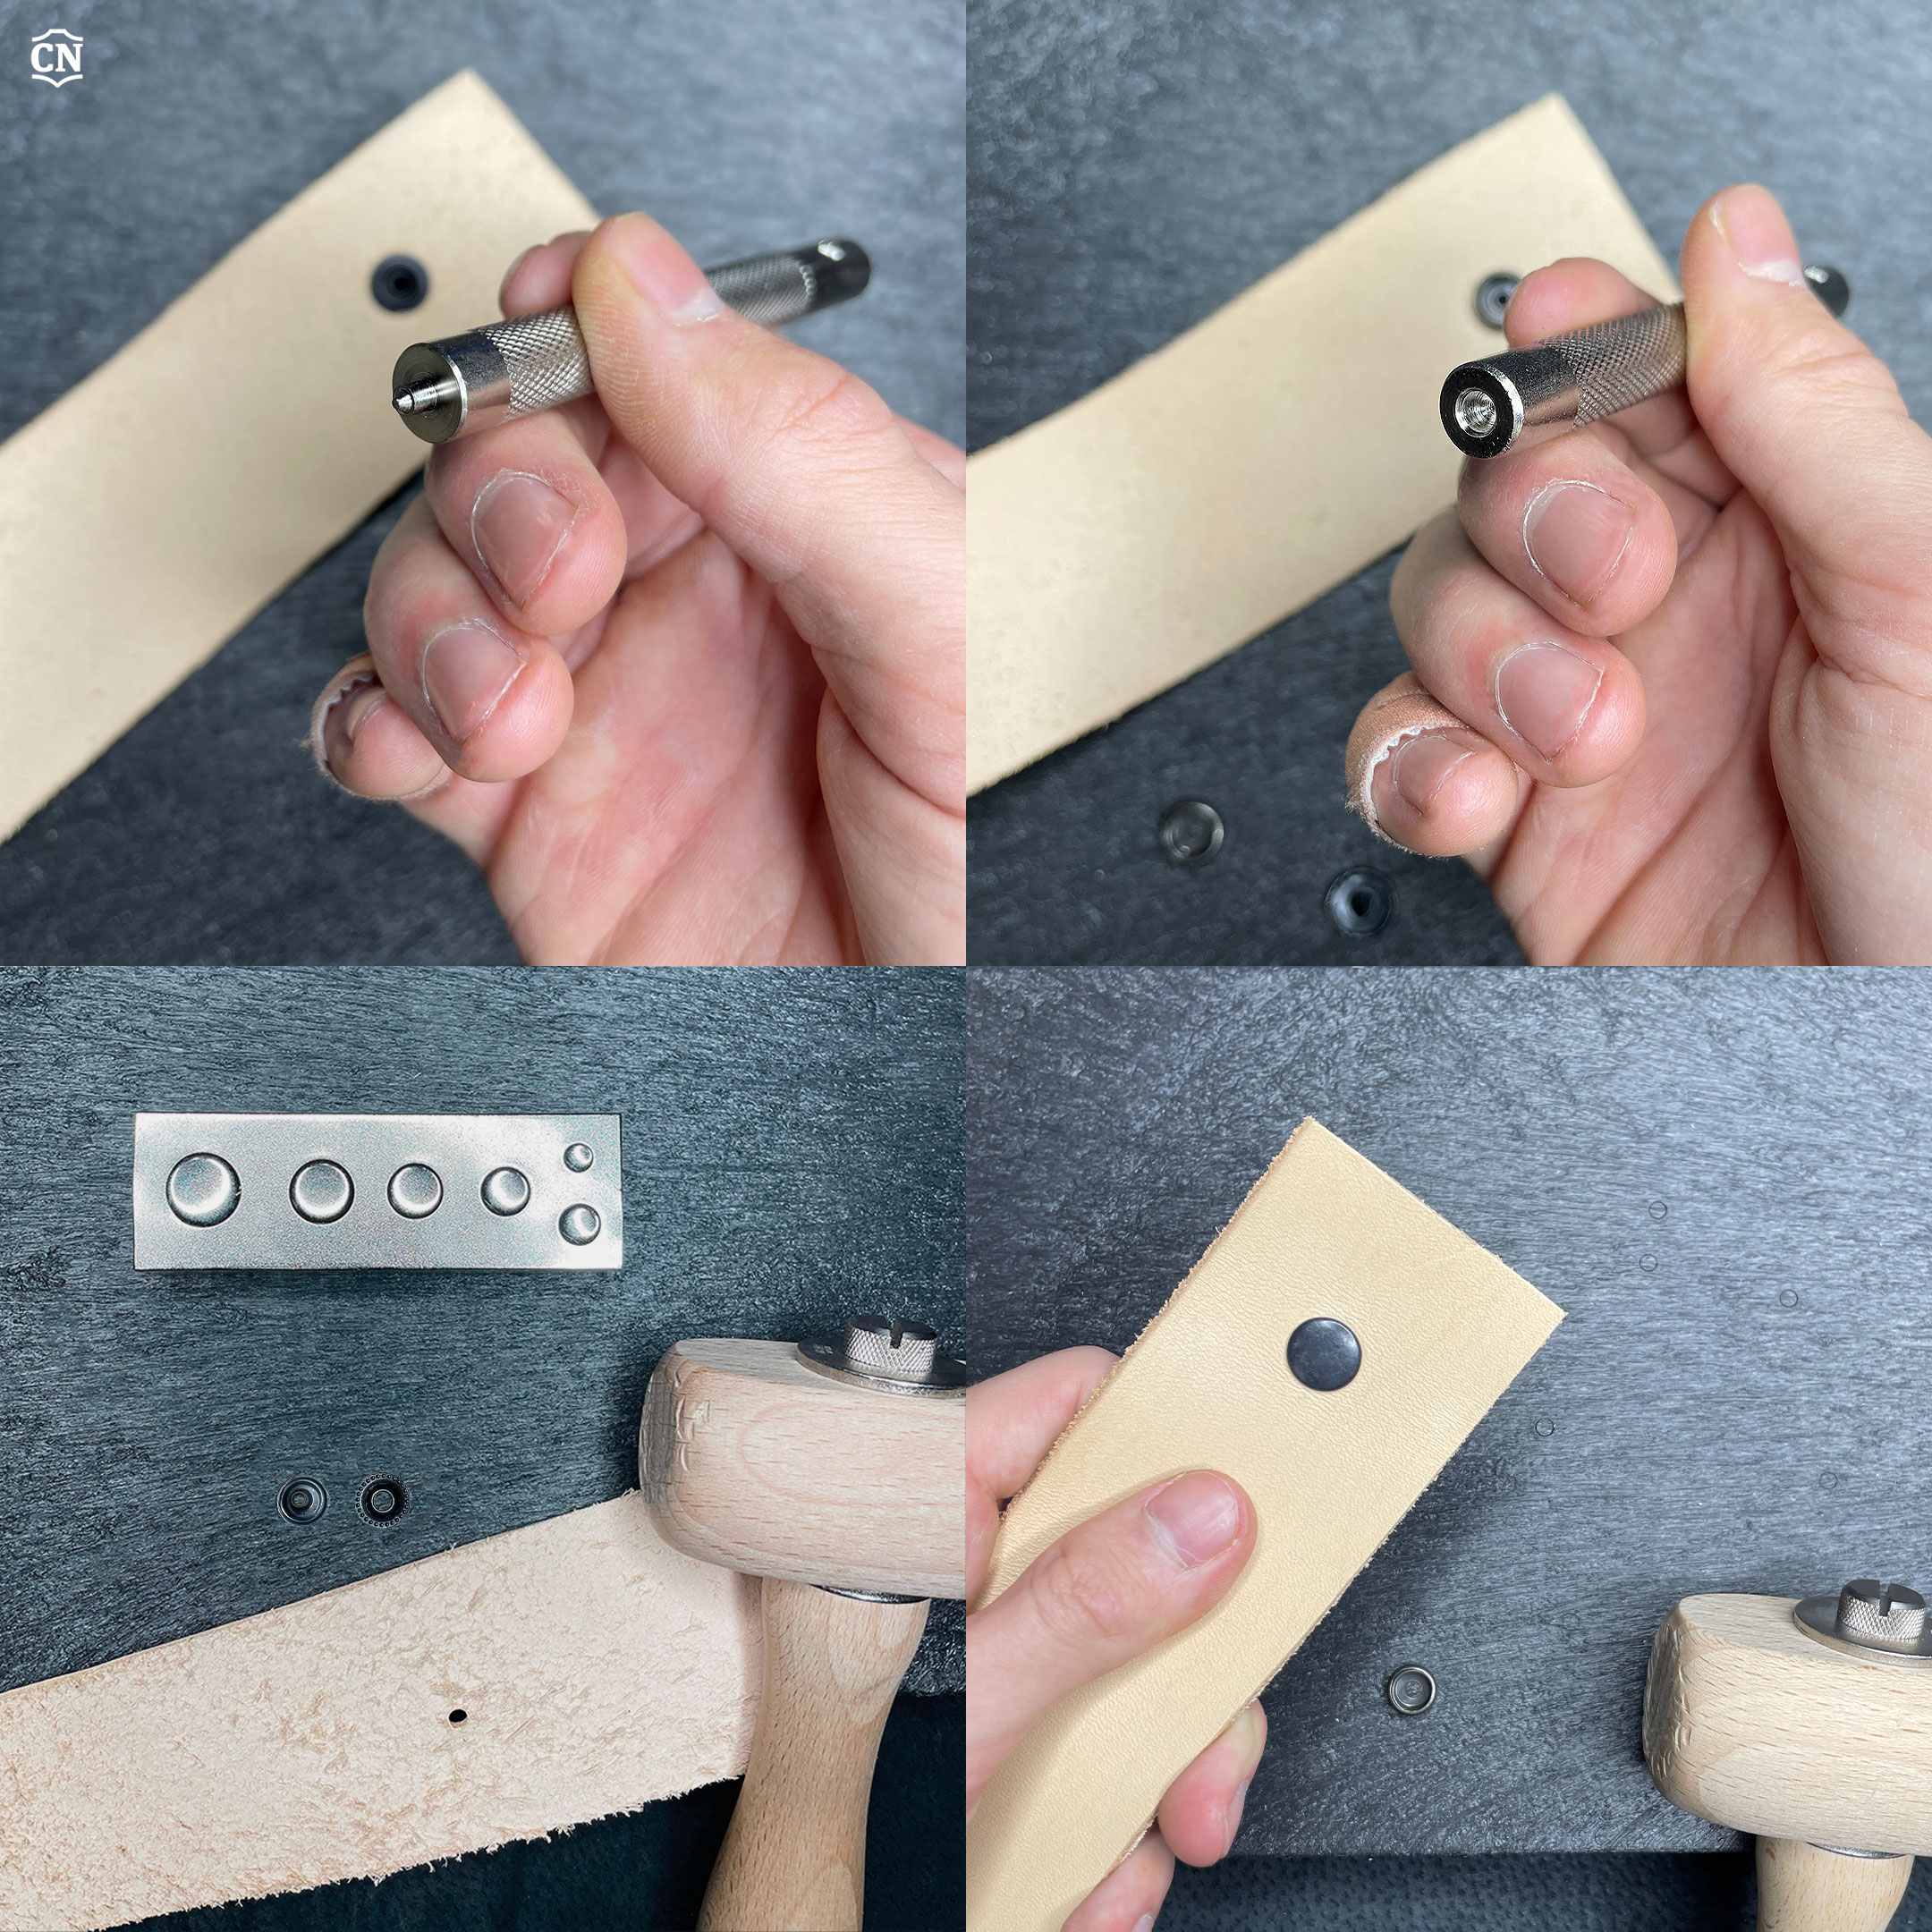
To seal your fasteners permanently, tap your buttons using a durable dot setter.
This tool is available in 3 different sizes depending on the diameter* of your buttons. Once again, renew your blows from your gavel on the top of the poseur to finalize the alliance.
*Here the size S was used to crimp the diameter 12.5 mm.
Step 4:

Now that the male parts have been assembled, all you have to do is crimp the female fastener by performing the exact same gestures with the same tools. (dot setter and maul).
Remember that the female parts are flat and therefore not suitable for the concave hollows offered by the anvil.
So be sure to hit them flat to preserve your buttons. This tip will be just as useful to protect your leather bags, leather wallets or bag handles against any striking marks during your manual work.
Final step :
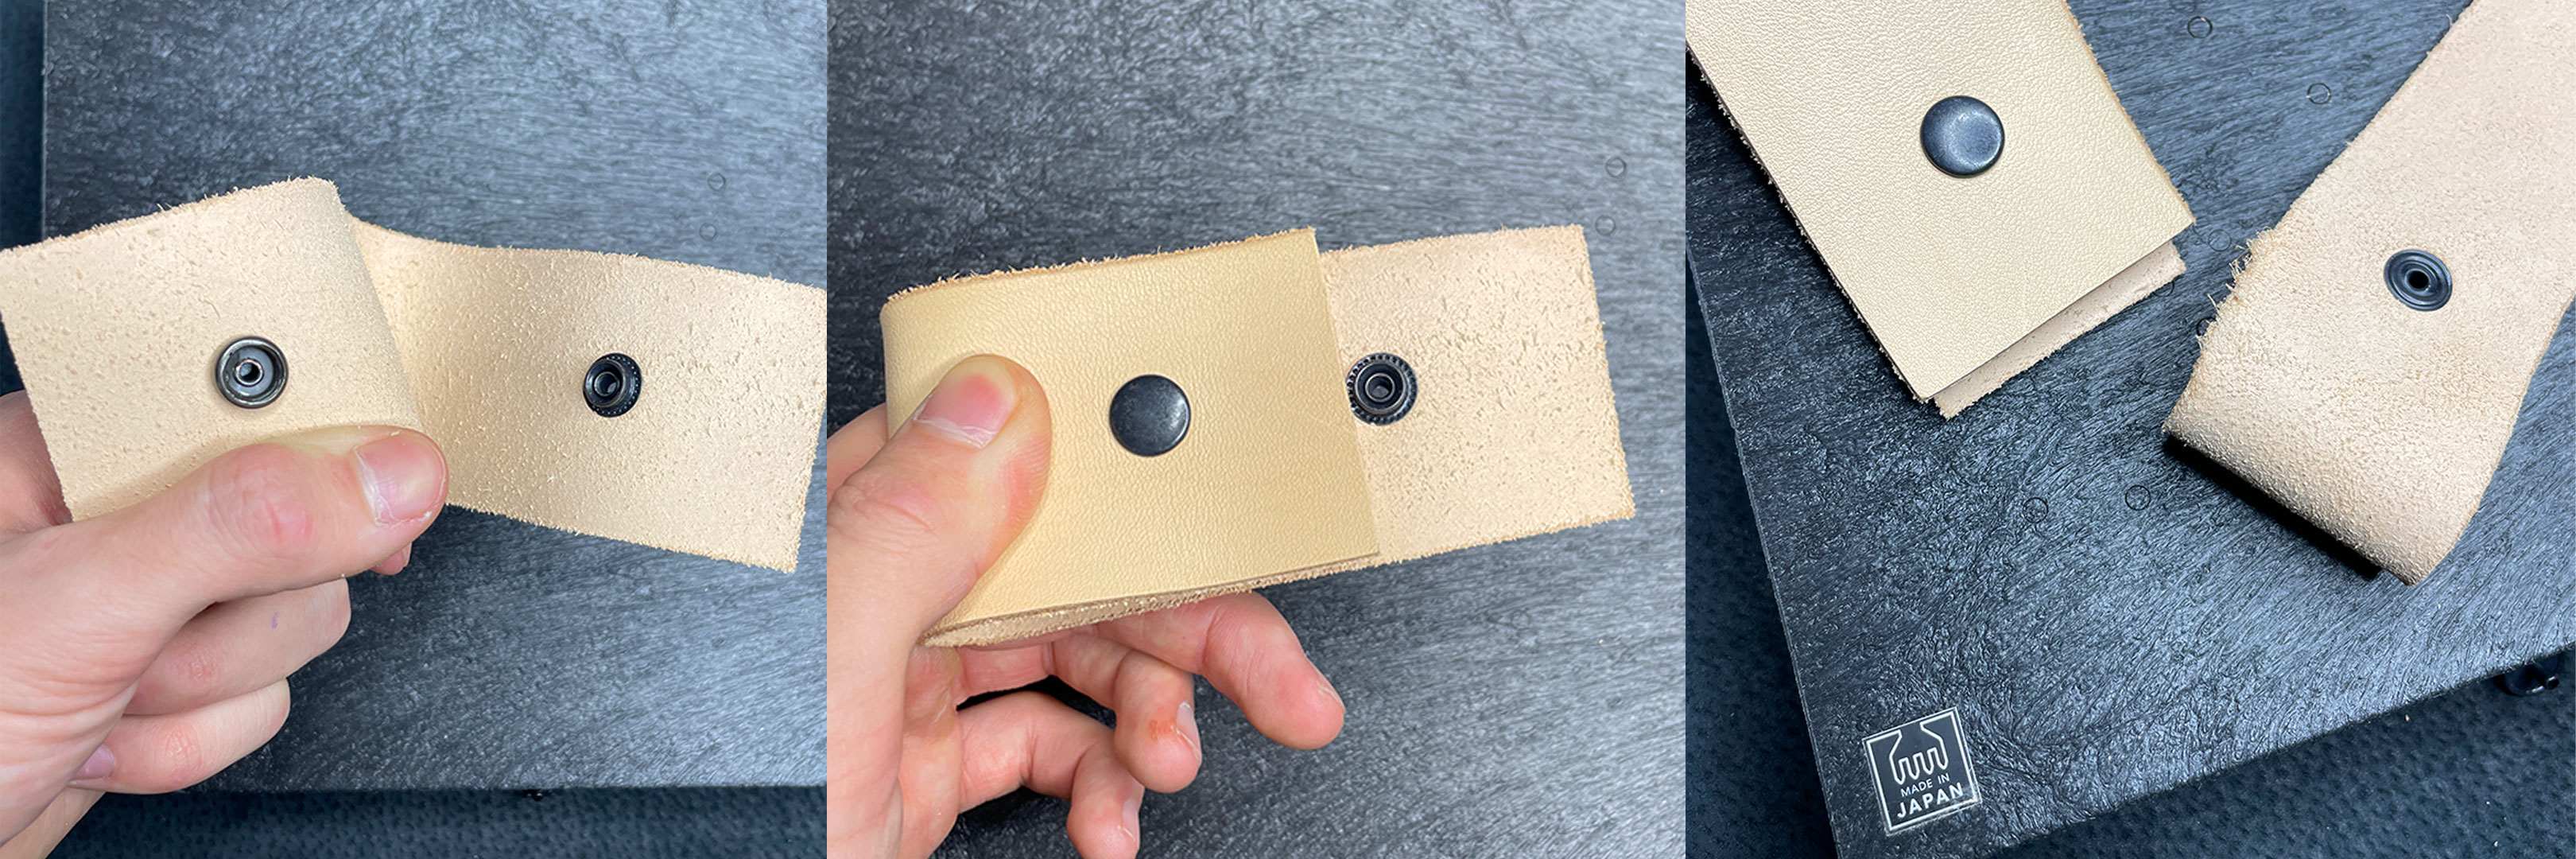
Congratulations, your press studs buttons are now ready to use! The strap on your leather strap is resealable. All you have to do is test its strength.
We often say that a picture is better than a thousand words. Find this TUTO through a much more detailed video on our YouTube channel.
We invite you to read our other articles on our BLOG.
You will find tips, tricks and technical elements that will allow you to become a real expert in the subject.